DIY Studio Build Diary

Customising, building or repairing your own gear? Need help with acoustic treatment or soundproofing? Ask away…

Moderator: Moderators

Re: DIY Studio Build Diary

Post by thefruitfarmer »

thefruitfarmer wrote:
Helmutcrab wrote:
The amount of time and money it is taking to d.i.y is just not worth it at all unless you like to d.i.y as a hobby. Making these panels as opposed to buying them has taken many months off getting music actually done.

That can be a problem sure enough.

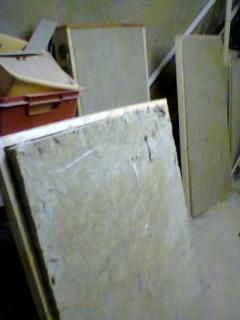
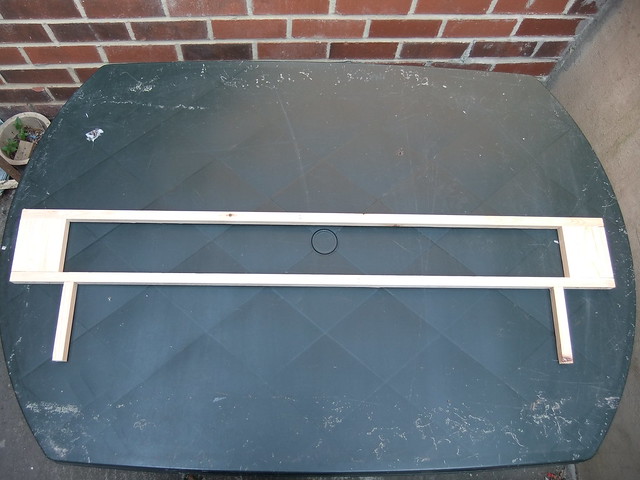
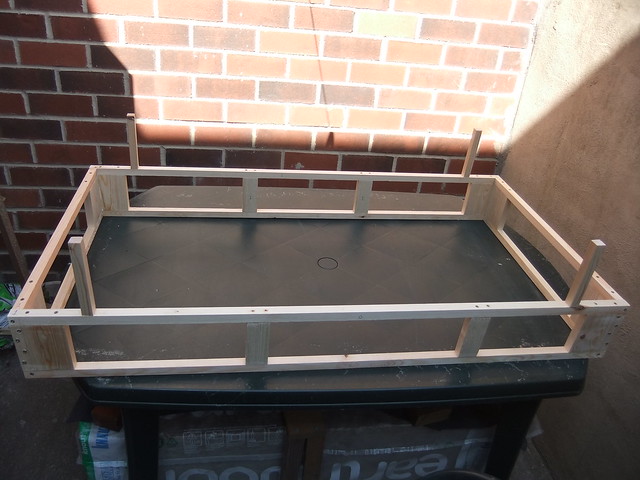
What I have found is that I can manufacture a bass trap in a fairly short time. But, that is with my assembly method practiced and understood, and with all the right tools; I have corner clamps, two drills, a work bench, staple gun.

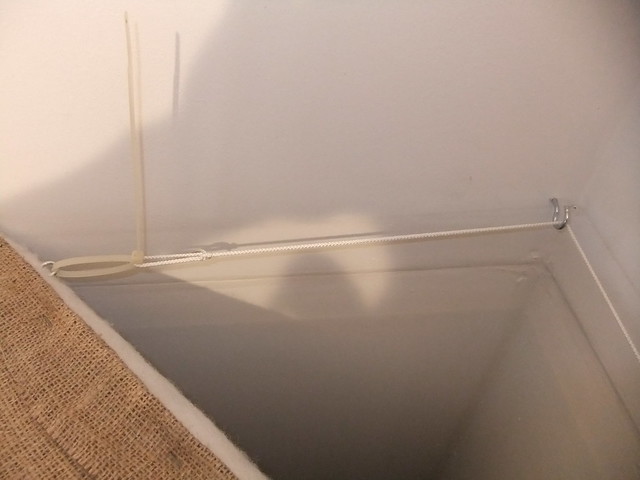
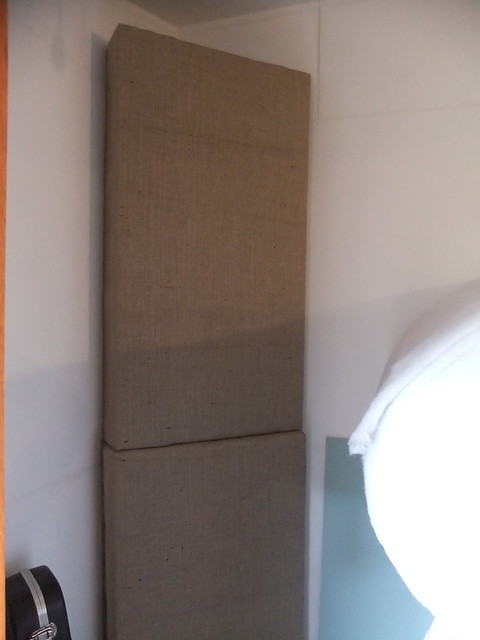
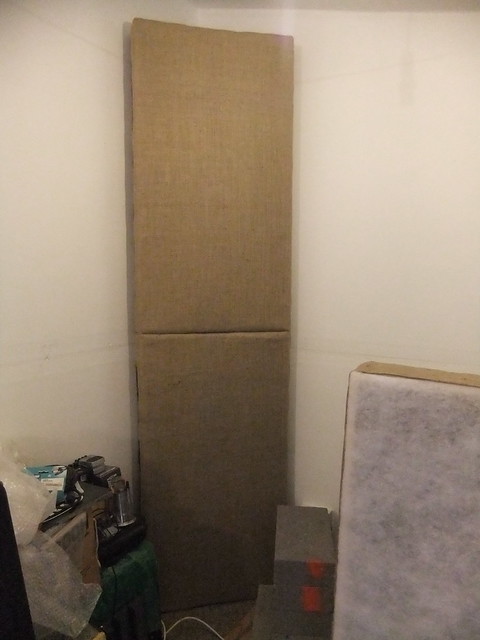
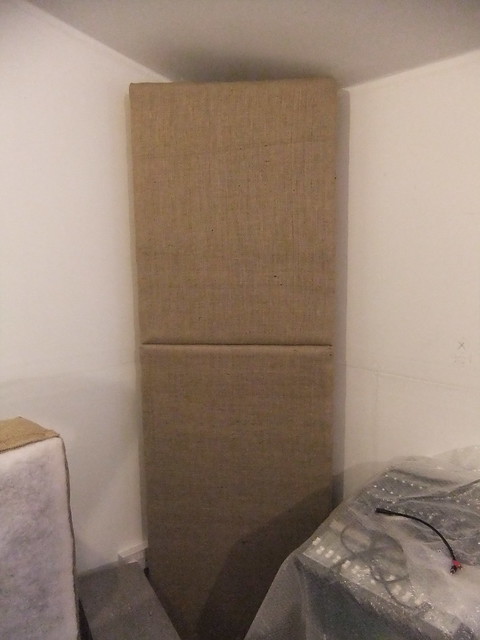
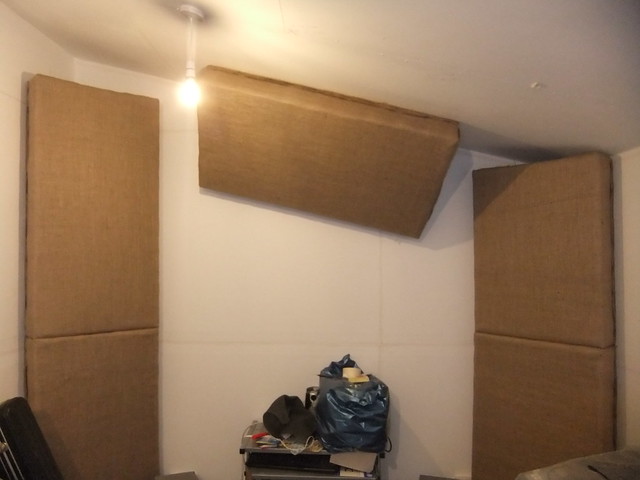
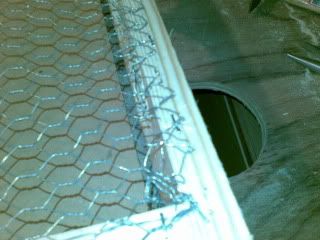
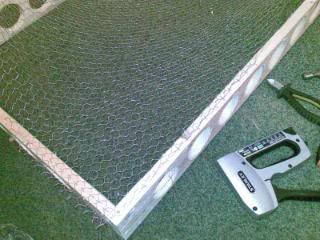
It is just a frame around a Rockwool slab, with chicken wire on the face, sprayed with a PVA solution and then covered with fabric. It sounds easy when you put it like that but like many things experience counts for a lot.....

...it is worth costing up all the materials of the traps and then factoring in your time as well it may well be worth buying ready made traps.

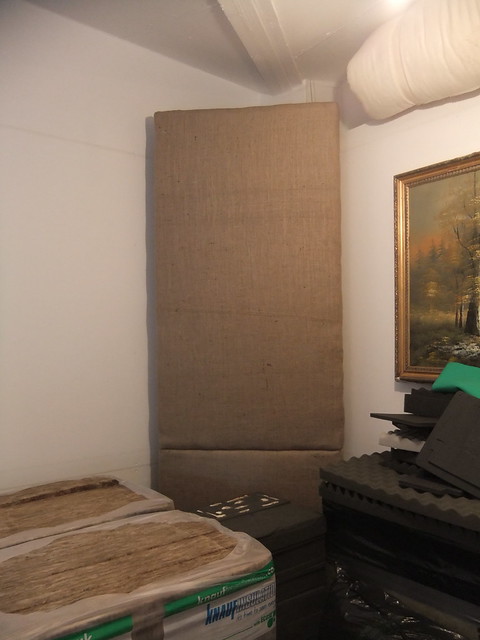
That said, I have 4 slabs of 25mm RW3 to turn into bass traps today so I will start a thread and see how long it actually takes me to do.

Build thread here.

That should read 4 slabs of 50mm RW3.

After about 6 hours I have 3 framed RW slabs sprayed with PVA solution and waiting to dry, which could take a few days with this cool and humid weather...

Image
User avatar
thefruitfarmer
Frequent Poster
Posts: 639 Joined: Wed Sep 01, 2004 12:00 am Location: Kent UK

Re: DIY Studio Build Diary

Post by Hugh Robjohns »

Scramble wrote:>sprayed with a PVA solution

Does that not reduce the effectiveness of absorbing higher-end frequencies though? (Not an issue if you're just after bass-trapping, of course).

Technically, yes, but practically it is negligible, and most rooms are seriously over-damped at HF anyway so its actually a useful thing in most cases! The benefits far outweigh the negatives.

H
User avatar
Hugh Robjohns
Moderator
Posts: 39023 Joined: Fri Jul 25, 2003 12:00 am Location: Worcestershire, UK
Technical Editor, Sound On Sound...
(But generally posting my own personal views and not necessarily those of SOS, the company or the magazine!)
In my world, things get less strange when I read the manual... 

Re: DIY Studio Build Diary

Post by Helmutcrab »

thefruitfarmer,

Thanks for the new thread. Having a workspace in doors to build in is a god send. If i could have worked inside i would have finished a long time ago with my build. Unfortunately working outside with rock wool and paper is not possible in the rain or strong winds and this has been my main stumbling block regarding how long it is taking.

Like you say once you have learned how to build them it doesn't take as long, but if you factor in all time spent from the start - research, planning, sourcing, ordering and collecting materials, learning how to build the panels and getting the right tools and upholstering panels ( and days lost due to weather in my case ) it all adds up to a considerable amount of time. At least i can build a good air gap ( 6" posts/legs ) into the structure of my wall mounted panels to secure them to the walls by building them myself and will have more surface area covered and by thicker panels than if i had bought commercial traps ( on a budget ).

Hugh,

Thanks for reminding me about not overdamping the highs. I know you have worked in a lot of rooms so i will try to keep the panels paper faced whenever not in direct reflection paths.

Cheers,

Peter
Helmutcrab
Frequent Poster
Posts: 521 Joined: Tue Aug 08, 2006 12:00 am Location: County Durham, UK

Re: DIY Studio Build Diary

Post by Helmutcrab »

Hi all,

It was taking too long to use chicken wire on both sides so only the bottom corner panels have this. For some of the top panels i used heavy duty twine to bring in the sides when the wood had warped outwards.

Image

To secure the panels to the walls i used 30mm eye screws from screwfix, one on each side ( slightly in from the sides so panels can be flush with the walls ) and a large eye hook/screw attached to the wood frame behind the plasterboard in the room corner. I then used this Hanging cord http://www.ukpictureframingsupplies.co.uk/low-stretch-picture-hanging-cord-no-3---sold-per-metre-167-p.asp I fastened a knot at one eye screw, then fed the cord though the wall hook and made a bow and knot. I fed a cable tie through this knot and the eye screw and pulled the tie till panel was secure.

Image

These are the panels as you walk into room. The bottom panel has a double wall mounted socket obstructing it from being flush with the wall so it juts out a little on one side. This is were the vocal area will be so the bottom panel is paper faced with 4oz wadding in front but the top panel has the paper to the rear so the front is fully absorbing.

Image

This is the next corner area as you go into room and is where drums will sit. I used paper faced panels with wadding in front to get the best balance of low end absorption but still taking the high's out to prevent some of the reflections. The room is still congested with materials for building panels and gear. Unfortunately i didn't have any storage facility which has made it more time consuming, having to move things around.

Image

The mixing area will have a lot of fully absorbent panels around the mixing position so for both sets of corner panels here i used paper facing but this time i did not use wadding in front to allow for some reflections from behind the speakers so as not to leave the mixing position too dead.

Image

At 6ft 11", the shortest corner in the room did not allow for two full panels so i made a shorter top panel.

Image

Tomorrow i am putting the first wall/ceiling corner panel up. Sorry photo's are a bit dark.

I haven't done any tests yet but i think the room already seems a little better balanced.

Cheers
Helmutcrab
Frequent Poster
Posts: 521 Joined: Tue Aug 08, 2006 12:00 am Location: County Durham, UK

Re: DIY Studio Build Diary

Post by thefruitfarmer »

Helmutcrab wrote:
Tomorrow i am putting the first wall/ceiling corner panel up. Sorry photo's are a bit dark.

I haven't done any tests yet but i think the room already seems a little better balanced.

Cheers

It's all looking very neat and tidy in there.

Did you fit these panels on your own?

You may need an assistant to fit the wall/ceiling panels.

I have done this on my own, but it is *so* much easier as a 2 man job.
User avatar
thefruitfarmer
Frequent Poster
Posts: 639 Joined: Wed Sep 01, 2004 12:00 am Location: Kent UK

Re: DIY Studio Build Diary

Post by Helmutcrab »

HI thefruitfarmer,

Cheers, yes i fit the corner panels myself but my dad is helping me to do the rest, can't today though unfortunately :frown:

Thanks for the tidy comment - one of the first i've ever had :) You should see the rest of the room ! ( just way too much unused old stuff in there i need to get rid of ).

Honestly, i don't know how you did wall or ceiling panels yourself - thats some achievement.

Will get a picture up next week once its done.

Peter
Helmutcrab
Frequent Poster
Posts: 521 Joined: Tue Aug 08, 2006 12:00 am Location: County Durham, UK

Re: DIY Studio Build Diary

Post by thefruitfarmer »

Helmutcrab wrote:
Honestly, i don't know how you did wall or ceiling panels yourself - thats some achievement.

It was possible to fit a ceiling/wall trap myself, I had to use a stack of boxes to support one end.

So much easier as a two man job.
User avatar
thefruitfarmer
Frequent Poster
Posts: 639 Joined: Wed Sep 01, 2004 12:00 am Location: Kent UK

Re: DIY Studio Build Diary

Post by Helmutcrab »

Thanks for that link, i was looking for it when i fitted my wall-ceiling panel. That looked hard work.

I am fitting 6" spacers ( 4 per panel ) on to my wall mounted panels at the moment. They are same as frames ie 20 x 20mm. I am wondering if i should just glue them to the frames after they are made with no more nails glue. I have built one into the frame to give it a little more support. Problem is i can only use one screw per spacer from frame to spacer with wood glue, but if they snap when knocked or fitting it may snap the frame of the panel as well as the spacer, where as if i just glue them after, if they snap off they can just be reattached. The one i've built into the frame doesn't have much more strength anyway as it is just using one screw and glue. Any ideas ?

:?
Helmutcrab
Frequent Poster
Posts: 521 Joined: Tue Aug 08, 2006 12:00 am Location: County Durham, UK

Re: DIY Studio Build Diary

Post by Helmutcrab »

Here is the first wall-ceiling panel in place ( again 6" deep panel ). This again is paper faced without wadding to give some high reflections back into mixing area. The panel is behind the speakers so is not in the reflection free zone.
This was quite difficult to fit even with two people due to the parallel placement of the ceiling joists and the sloping of the wall-ceiling. I think fitting the rest of the wall-ceiling panels will be easier ( i hope ), as the joists run perpendicular to the walls everywhere else in the room.
I used the same method of attachment as for the upright panels except i used two large ceiling 75mm eye screws ( ceiling is double plasterboard) near both sides and four 30mm eye screws on the panel itself spaced 100mm in from the edges so as not to be visible. Although the panel is solid, with hindsight i should have used 40mm eye screws on the panel to prevent failures. I will be doing this on remaining panels i think. Although the 30mm eye screws seem solid enough, they just look way to small for the job and a failure would be disastrous !

Image

This is the first part of a wall mounted panel with 150mm wall spacers built into the frame. The middle two frame supports are yet to be added on this one.
I decided to build them into frame to give more support. I used one larger screw (50mm x 4mm) and wood glue to attach them from inside the frame, this gave enough support without having to use two smaller screws. Should the spacer ever snap i should be able to screw on a replacement one as long as the frame is not damaged.
This was a bit time consuming to do as i had to add on to the table top workbench Jig i made to accommodate for the now 30cm width of the panels. I don't think this would be a problem with a dedicated workbench.

I looked into screw on door stoppers but found them relatively expensive compared to d.i.y wood and they only seemed to come in a maximum of 4" and i wanted 6" for better performance.

Image

Cheers
Helmutcrab
Frequent Poster
Posts: 521 Joined: Tue Aug 08, 2006 12:00 am Location: County Durham, UK

Re: DIY Studio Build Diary

Post by Helmutcrab »

Here is a finished frame with 150mm ( 6" ) spacers. Seemed solid on wall when i tried it. Will be hung from ceiling beams though as wall is not particularly weight bearing. Will use blu-tac or no more nails just to keep in place on wall, should it get knocked.

Image

Cheers
Helmutcrab
Frequent Poster
Posts: 521 Joined: Tue Aug 08, 2006 12:00 am Location: County Durham, UK

Re: DIY Studio Build Diary

Post by Helmutcrab »


Finished another 8 frames ready for rock wool etc.

I have been wondering why it is taking me so long to build and i realised today that i have probably been over engineering these wooden frames for peace of mind. For a frame with spacers on, it takes 76 screws per frame, so thats 76 x countersinks, drills and screws plus gluing ( very messy ).
With 6" panels, using full thickness planks of wood was never an option due to price, but i'm pretty sure i could have saved a lot of time by using only 44 screws instead. Problem was i just didn't want to risk it as if the corner joins failed it would ruin the panel and it would also be using single screws for the individual frame joins ( not good ) and so relying on glue to maintain position once dried.

I will be fitting the rock wool, chicken wire, paper, wadding and hessian next week.

I think another 4 panels for ceiling clouds ( drums and mixing area ) plus one more for side wall ( which is very close to drums ) will do it. Thats 22 in total. Once these are up i will be able to see if i need any more. I also have some old 2" acoustic foam tiles that i can use once the panels are up if needed.

Cheers.
Helmutcrab
Frequent Poster
Posts: 521 Joined: Tue Aug 08, 2006 12:00 am Location: County Durham, UK

Re: DIY Studio Build Diary

Post by Helmutcrab »

Finished 9 panels but after listening, the panels on the back wall with paper facing and wadding still reflect too much mids and highs for drum recording/acoustic instruments and they are close to instruments with their spacers on. Kind of got lost a bit and forgot i needed the back wall as dead as possible for this reason ( room is also asymmetrical and i aim to use convolution reverbs extensively ). So, i am redoing six panels and turning around the corner panels here and reupholstering them so they have full absorption.
I also realised why the paper was wrinkling up on the panels. I have been applying the spray glue for the paper wrong ( thanks to Steve2701 over on Ethan Winers Forum for explaining this ) which isn't a big deal but will reduce the effectiveness of paper faced panels at absorbing the lows.
For the record, you only need to spray a fine spray and let the glue go almost off - sticks upon touch - i didn't stick to the directions :headbang:
I am concerned the room will be too dead now as the only panels i can have with reflections ( all paper faced ) are those on the wall behind the monitors ( mixing position ). Everywhere else there will now be full absorption. I suppose there will be some life at the mixing position, where i need it.

Cheers
Helmutcrab
Frequent Poster
Posts: 521 Joined: Tue Aug 08, 2006 12:00 am Location: County Durham, UK

Re: DIY Studio Build Diary

Post by thefruitfarmer »

Helmutcrab wrote:
I am concerned the room will be too dead now as the only panels i can have with reflections ( all paper faced ) are those on the wall behind the monitors ( mixing position ). Everywhere else there will now be full absorption. I suppose there will be some life at the mixing position, where i need it.

When you have a small room or with an unusual shape the advice I had at one point was to make it as dead as possible...on the grounds that any reflections won't be conducive to mixing. I reckon you would need a room that sounds good anyway if you are going to go for a more reflective mixing room.

A very dead room is still useable, you can still mix in it but there is some danger you will add too much reverb and echo. When this happens and a track is played in a living room it will have too much verb on it, bearing in mind that you are hearing it with the reverb of the living room also......

.. in practice it is not a problem if you listen to reference material in the studio.

If the room is very dead it can be good for recording vocals in but what I find is that acoustic guitars, a miced guitar amp, shakers etc all benefit from being recorded with some room reflections too.
User avatar
thefruitfarmer
Frequent Poster
Posts: 639 Joined: Wed Sep 01, 2004 12:00 am Location: Kent UK

Re: DIY Studio Build Diary

Post by Helmutcrab »


Hi fruit,

I was told by Ethan Winer that any panels close to instruments or microphones should not be reflective at all. Somehow i lost sight of that but am changing the panels now. He also said panels that are out of the RFZ or first reflection points can be paper faced to help at the mixing position. In my room, this only translates to the wall behind the speakers, so i have used paper facing on all the panels behind the speakers and whilst the paper won't be doing that much useful to help bass ( as i glued them wrong ) they do add a really nice air to the mixing area which hopefully will stop it from sounding completely dead once these next lot of panels are in place.

Yes, i also found some early reflections helped with acoustic guitar and cello. I used a wooden board underneath the performer for this - which i am now using as the work bench to build these panels !

Thanks again for your advice, its always much appreciated :)

Cheers
Helmutcrab
Frequent Poster
Posts: 521 Joined: Tue Aug 08, 2006 12:00 am Location: County Durham, UK

Re: DIY Studio Build Diary

Post by Helmutcrab »

Iv'e changed those panels around but have misplaced my camera charger, so i will get photos of them on the walls as soon as i can.

I am now thinking about the overhead drum cloud. I plan on making three 2' x 4' panels at 6" depth over the drums, but the ceiling slopes from just under 9 feet on one side of the room to 7 feet at its lowest on the other side. The panels would intersect the transverse crossbeam rafter where it is 7'2" high. Using 6' panels therefore only allows a standing height of 6'8". This is where you have to walk into the room as well, so it may seem a bit oppressive. The panels will have to be tight on the ceiling at this lowest height, but will stay horizontal across to the other side of the room so most of the area will have a variable air gap behind the panels.

Now i am no giant but 6'8" seems a bit low. If i make 6" panels then there is no going back.

I am assuming that this is enough height for overheads, but i don't know. I think i might have to get things set up first to see if this height is enough to prevent overhead mic overloads and give enough height for the right placement. I will be using ribbon mics for overheads which i have not had much previous experience with.

Does anyone have advice on drum cloud height and also on its back to front position eg is it best to at least cover the area the drums and cymbals occupy ?

Thanks

Peter
Helmutcrab
Frequent Poster
Posts: 521 Joined: Tue Aug 08, 2006 12:00 am Location: County Durham, UK

Re: DIY Studio Build Diary

Post by Helmutcrab »

Hi All,

So after a while i realised i left the camera charger in the bag i left on the plane !

Got 18 panels up and fixed in place and arranged drums in room. I did some preliminary recordings and also listened at the drum area whilst playing the drums. Its not ideal where drums are but is the only way they can go ( see first diagram of room on first page of thread to see where they sit ).

I am now making a final nine 6" frames. These are as follows : 3 ceiling panels for drums, and one ceiling panel over the mix position, 4 floor panels around where the drums sit close to walls to tighten things up a little more and one either above the floor panels at the side wall or at side wall of mixing position depending on which needs it most.

I will hopefully get camera working again soon and get some photos up of the work done.

Thefruitfarmer,

I have a question please. I was trying to further lighten my frame design for ceiling placement. The timber yard had in 15mm dressed timber but when i checked the staples i use (140 series) are 11mm wide, so thats just too tight to fit the chicken wire. You mentioned before that you make frames using 12mm width wood. I am just wondering how you staple the chicken wire to the long sides of this ( where the staples need to go across the width of the wood ) please ?

Cheers
Helmutcrab
Frequent Poster
Posts: 521 Joined: Tue Aug 08, 2006 12:00 am Location: County Durham, UK

Re: DIY Studio Build Diary

Post by thefruitfarmer »

Helmutcrab wrote:
Thefruitfarmer,

I have a question please. I was trying to further lighten my frame design for ceiling placement. The timber yard had in 15mm dressed timber but when i checked the staples i use (140 series) are 11mm wide, so thats just too tight to fit the chicken wire. You mentioned before that you make frames using 12mm width wood. I am just wondering how you staple the chicken wire to the long sides of this ( where the staples need to go across the width of the wood ) please ?

Cheers

It still works if you staple parallel to the long edge..

Image

Image

So long as you give the chick wire some tension you will be okay.
User avatar
thefruitfarmer
Frequent Poster
Posts: 639 Joined: Wed Sep 01, 2004 12:00 am Location: Kent UK

Re: DIY Studio Build Diary

Post by Helmutcrab »

Ah of course. Didn't think of that. Thanks thefruitfarmer.

Unfortunately my order went through really quick at timber yard so i am stuck with 20mm for all 9 remaining panels. Still 5mm would't have made a huge difference but every little helps when your working above head. If i am to make any more panels in future i would certainly make them a bit thinner and lighter as these frames are pretty heavy.

Thanks again.

Peter
Helmutcrab
Frequent Poster
Posts: 521 Joined: Tue Aug 08, 2006 12:00 am Location: County Durham, UK

Re: DIY Studio Build Diary

Post by Helmutcrab »

Hi All,

Thought i better update this, as its been a while, but its a boring bit of news really. I never got the rest of the photos up but got the room closer to being finished and then took ill last august and am still ill now unfortunately so i was unable to finish the room and have not been able to use it :frown:

Mostly finished all the panels except the 5 ceiling panels - only made the frames for these. There are about 30 panels in total i think.

Can't see how i can actually get the room done now unfortunately, with it being D.I.Y. My dad could have helped but i am physically unable to do anything really. I suppose i would have to employ someone. Think i will just have to wait to see if i get any better as i would not be able to use the room anyway really in my current state.

Being ill is really boring and annoying. Will just have to carry on doing rough demos in bedroom for now.

All the best,

Cheers
Helmutcrab
Frequent Poster
Posts: 521 Joined: Tue Aug 08, 2006 12:00 am Location: County Durham, UK

Re: DIY Studio Build Diary

Post by Studio Support Gnome »

AS a quick update for readers of this thread….

The room is now done.

Someone had to rescue Peter and his dream

so I did.
User avatar
Studio Support Gnome
Frequent Poster
Posts: 2914 Joined: Tue Jul 22, 2003 12:00 am Location: UK
Mostly Retired from Audio.... If I already know you I'll help,  if not....    Ask Hugh Robjohns, unless that is you're in need of 80's shred guitar... that, I'm still interested in having fun with...
Post Reply